Sugar Box 60

Sugar Box 60
An unwritten law in amplifier design is that the number of knobs and switches on a bass amp must be inversely proportional to the number of strings on the bass. Of course, we followed this law when designing the SugarBox60 ;-)
In addition to a 3-band tone control, the bassist has two footswitch-selectable boost functions, one for the low frequencies and one for the high frequencies. A sweep control for the bass-treble ratio, a drive control for the overdrive, and finally a master control for the output level. All in a compact stomp box.
The idea behind the SugarBox
The SugarBox60 is a full-featured tube preamplifier designed to be used in front of a power amplifier, be it a tube or transistor power amplifier. Since bass guitars need much more power than guitars, but the corresponding tube amps are usually very expensive and heavy, the desire arose for a flexible hybrid solution, in which powerful but light and much cheaper transistor amps can be used, which are then combined with the advantages of a tube preamp. Such transistor amplifiers (e.g. Class D) are available on the market in many variants – new and used – at fair prices. A kit for such an amplifier therefore makes little sense. The situation is different for the preamplifier, and this is where the SugarBox60 comes into play. It is the link between the bass on one side and the power amp on the other.
Since this kit, like the other kits of the LoV series, works with low anode voltages – 60 V to be exact – it is also very well suited to give the interested hobbyist a “safe” introduction to tube technology.
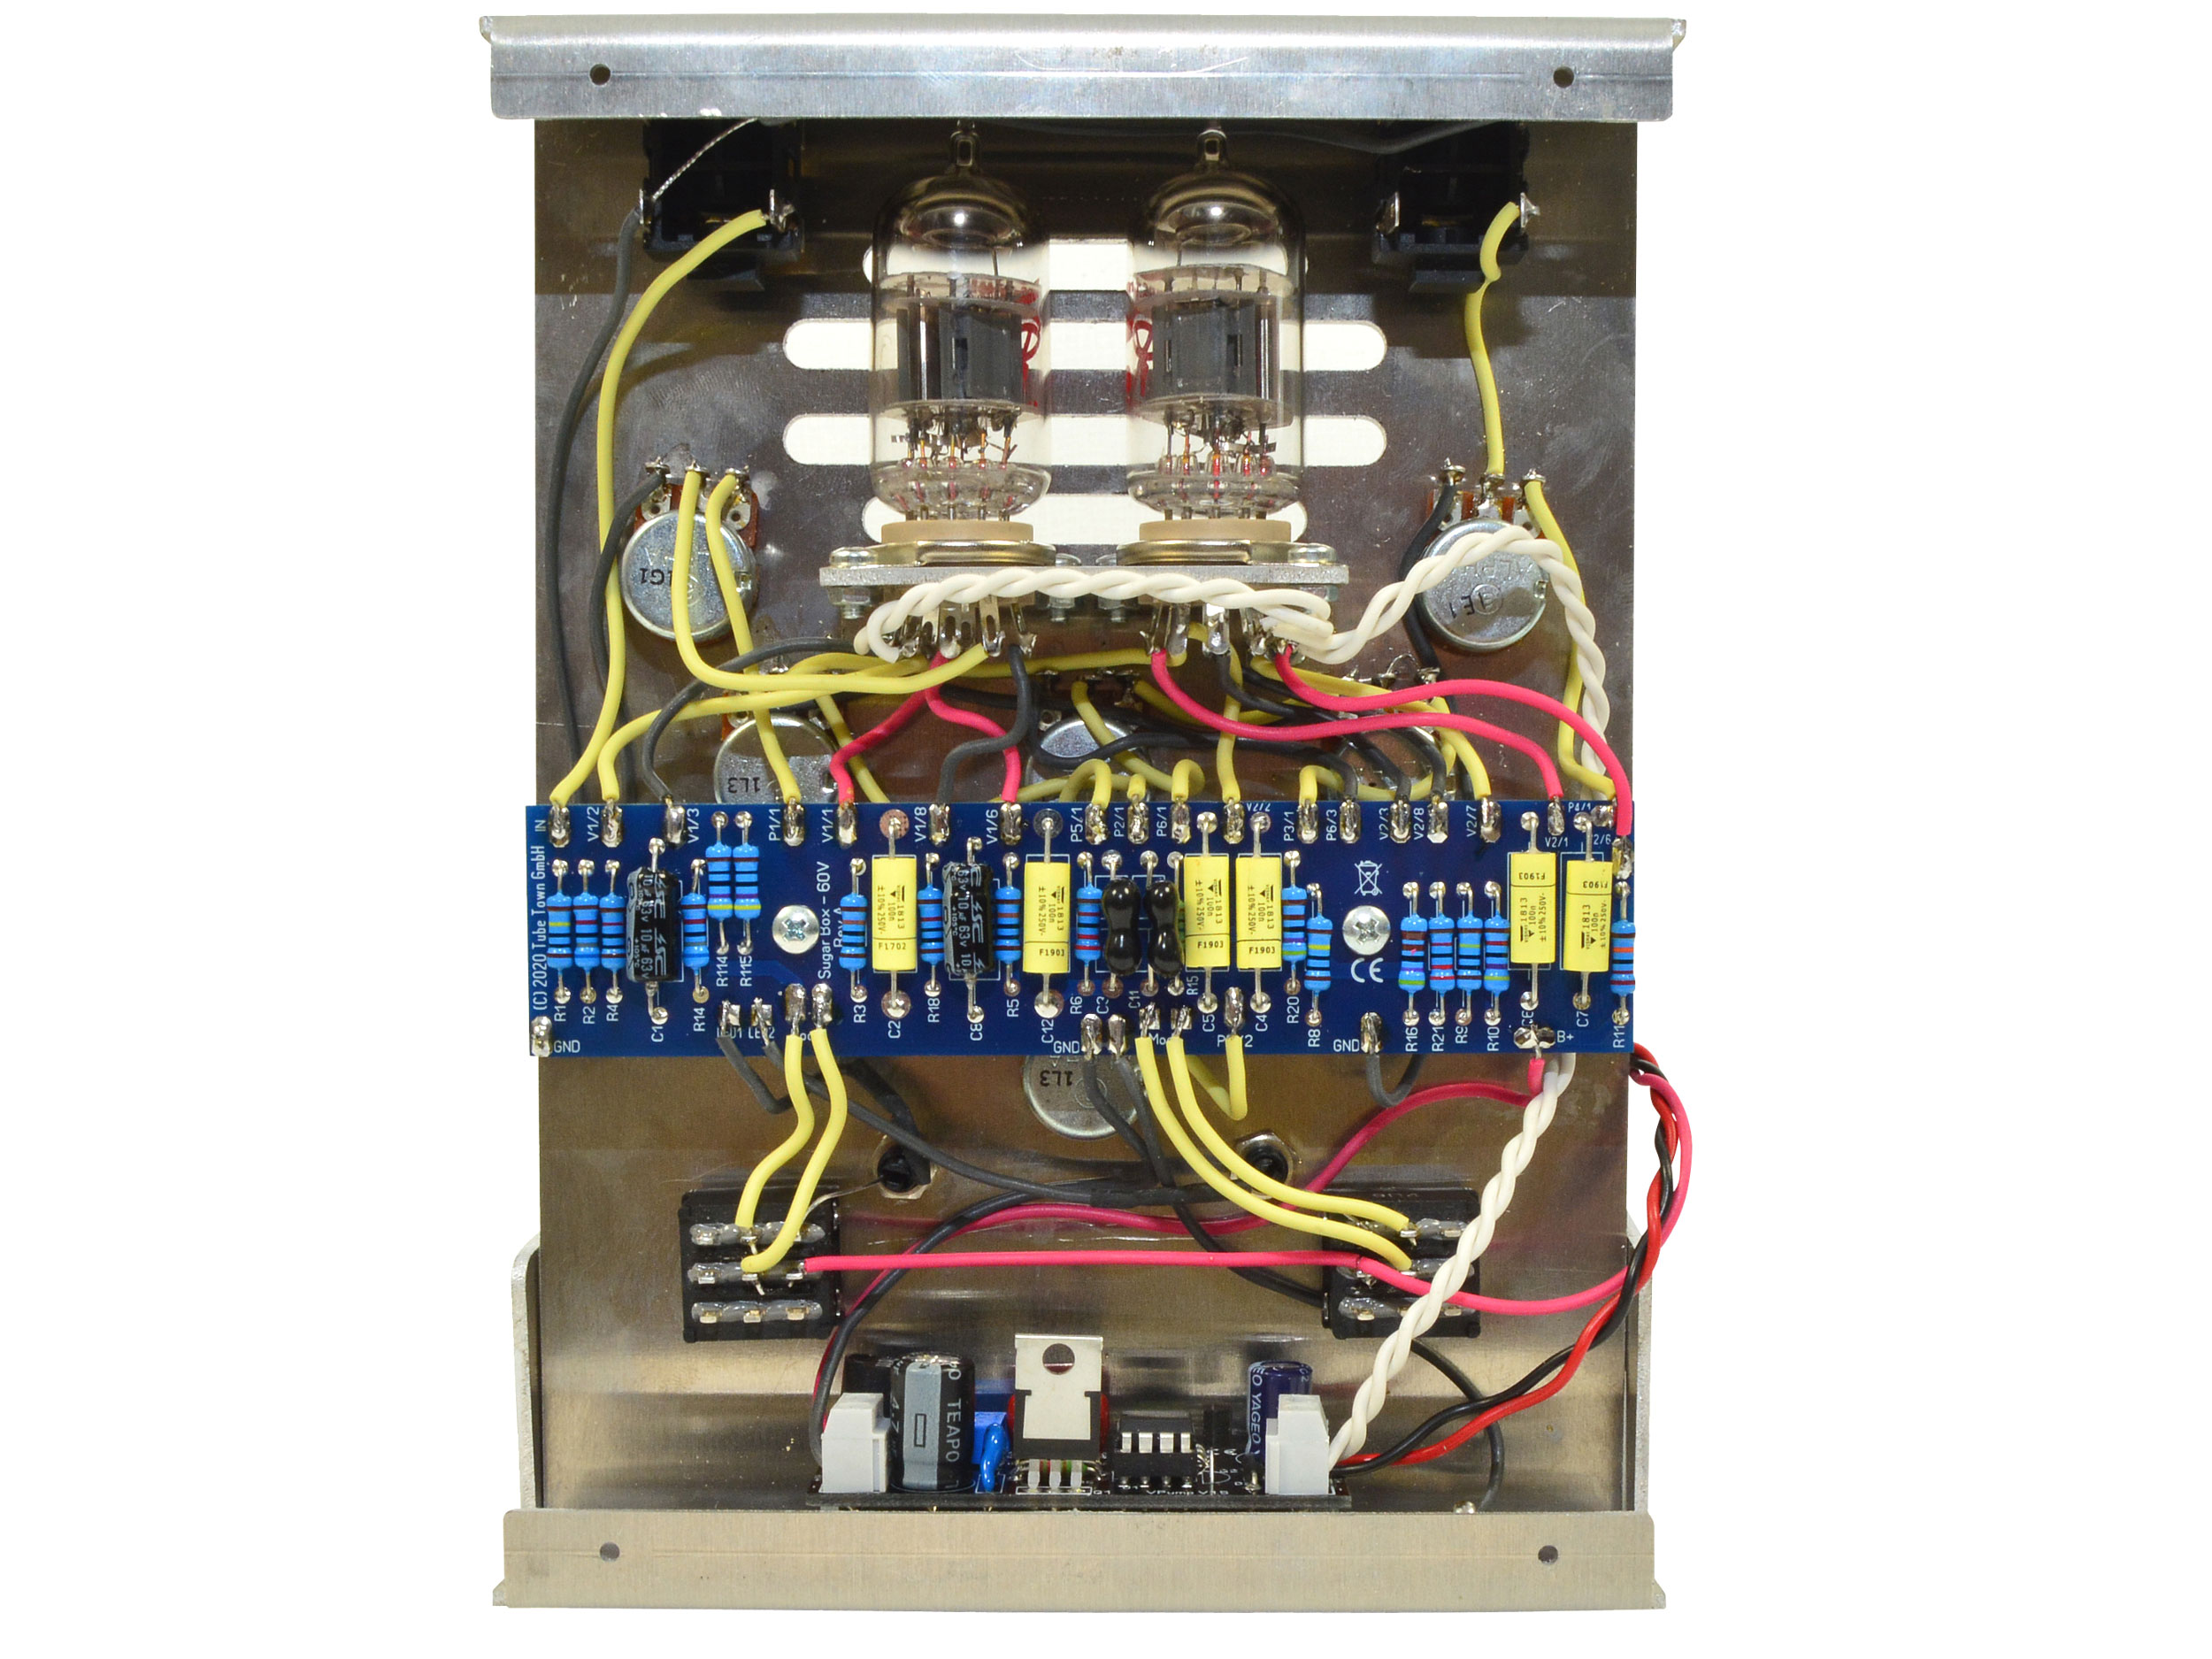
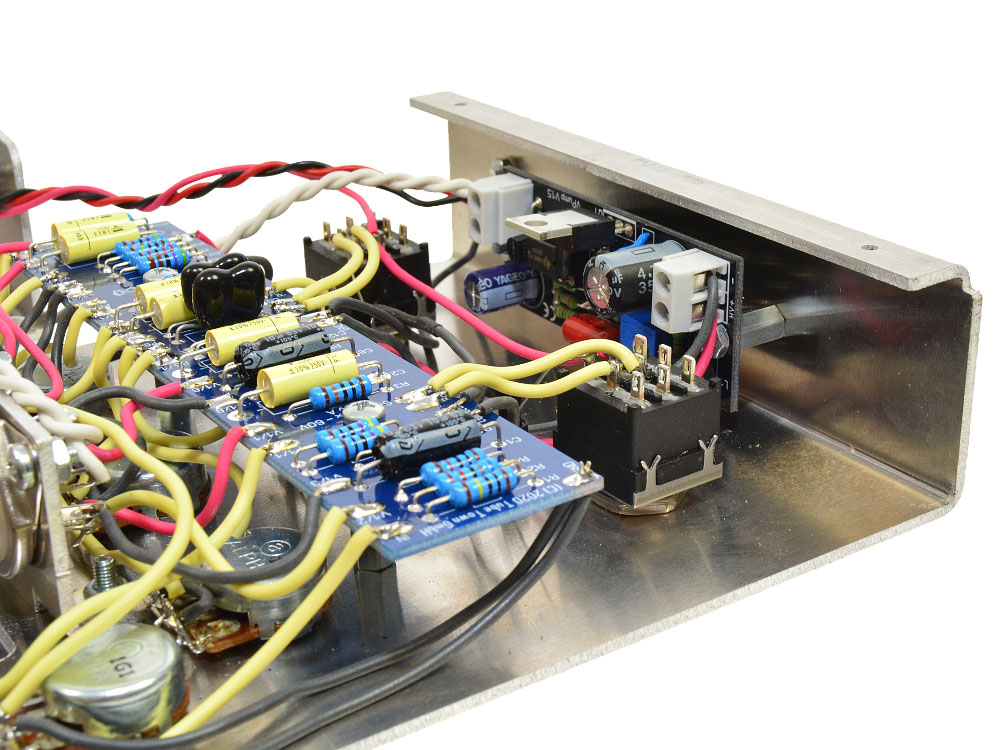
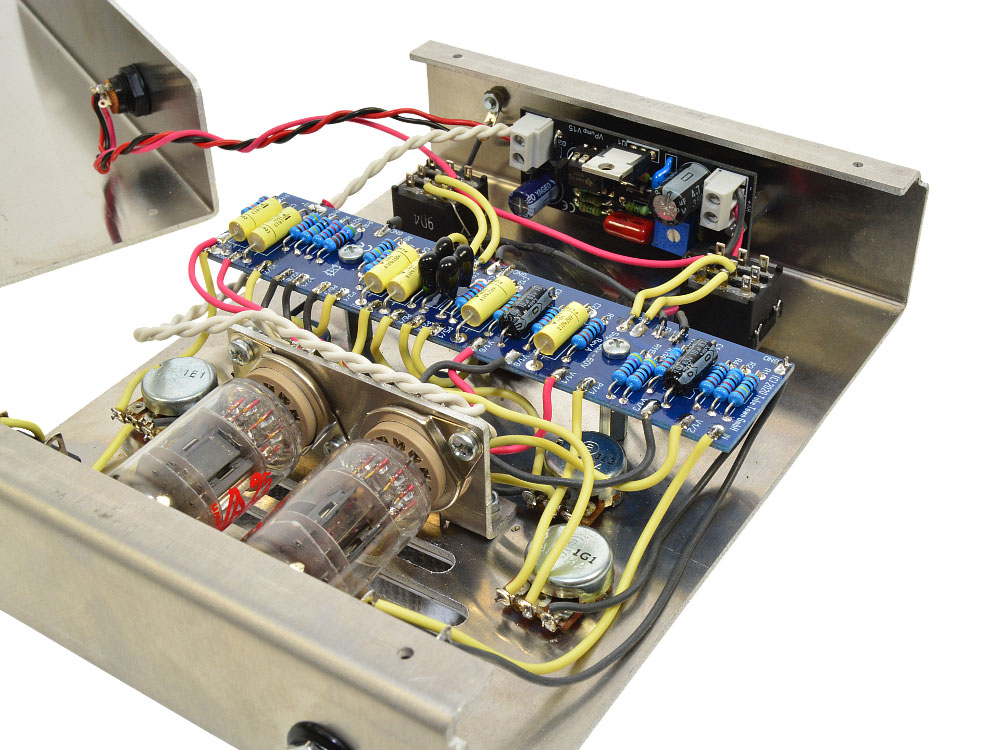
The circuit
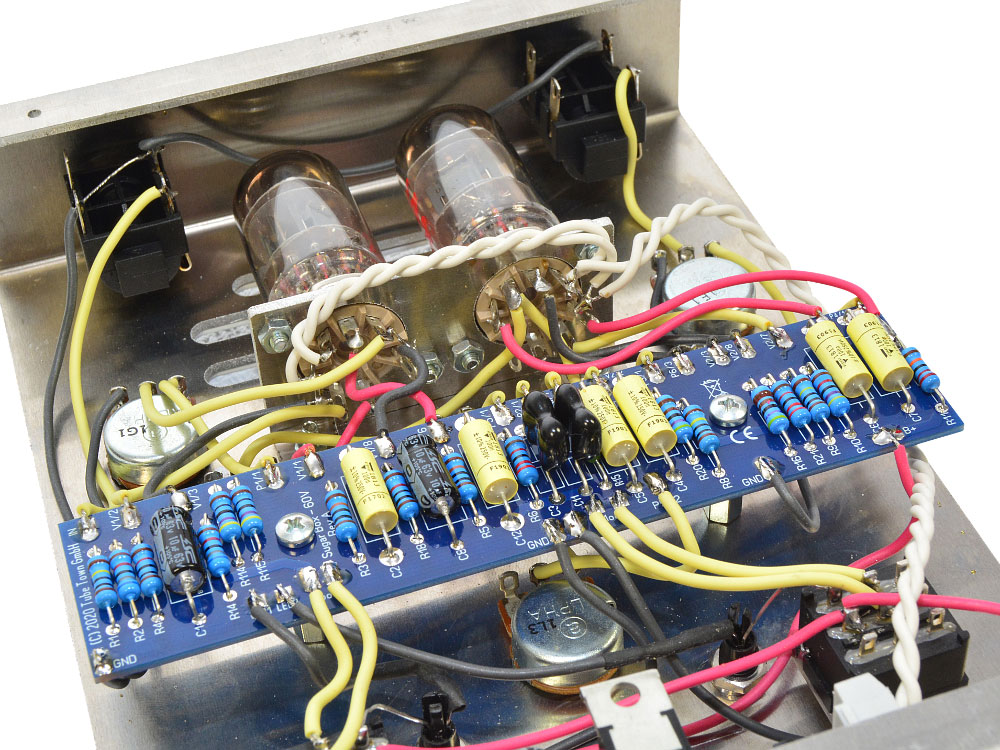
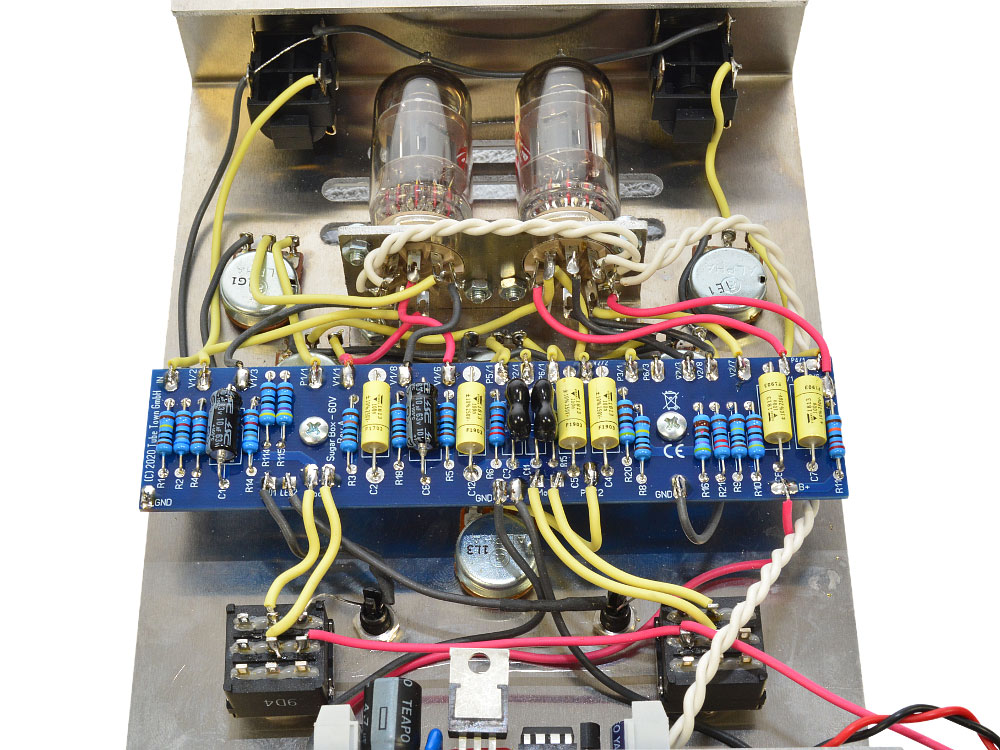
The circuit itself is quite simple, clearly structured and unspectacular. However, some component values are noticeable, especially those of the cathode resistors. This is not circuit voodoo, but simply due to the necessary adjustment of the operating points to the available operating voltage.
The tubes used are two 12AU7/ECC82. A bit unusual, especially with the low gain of a 12AU7, but in our opinion this type of tube fits very well into the circuit and delivers the desired sound while providing sufficient level for both the tone control and the power amp.
In principle, other tubes can be used. However, the operating point has to be readjusted and adapted to the respective tube type in order to achieve an optimal result. Simple plug & play will probably not work if optimal tuning is desired.
The first stage is equipped with a low boost, which has already proven itself with the BananaBooster. After that, the Drive-Potentiometer leads to the second gain stage. Depending on the position of the Drive-Potentiometer, this stage can be more or less overdriven. The following tone control is a classic passive 3-band tone control adapted for use with a bass. In addition to the normal bass mid/high controls, the fixed resistor normally located between C3 and C4 has been replaced by a combination of fixed resistor and potentiometer, forming the so-called “sweep”. This allows the mix ratio of these two controls to be further adjusted. Additionally, there is a capacitor-resistor combination across the treble branch that, when activated by a footswitch, acts like a “bright cap” (normally used with volume pots) to form the treble boost.
Since the tone control reduces the level very much, two more amplification stages follow, whose job it is to bring the signal level back up to a reasonable level, so that at the end there is a sufficiently high level available to drive the power amplifier.
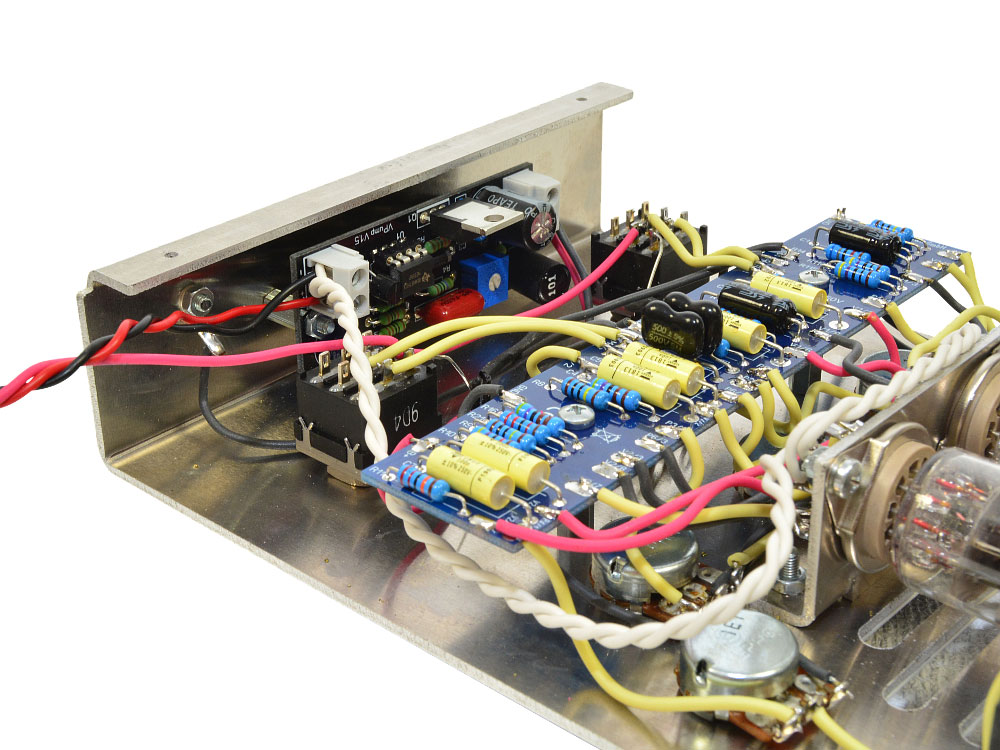
Powersupply
The 60 volt anode voltage is generated by a modified VPump. This is fed from a 12 volt DC operating voltage, which is most easily generated with a 12VDC plug-in power supply. The tube heater is powered directly from the 12VDC supply. Therefore, the power supply should be able to provide about 2 amps of current to ensure stable operation. The use of a switching power supply is recommended.
At this point, it should be mentioned that the heating voltage of 12 volts is perfectly sufficient to heat the 12AU7, even though the nominal heating voltage of this type of tube is 12.6 volts according to the data sheet. In electrical engineering, and therefore in tube technology, all components are subject to a certain tolerance. If you apply a realistic tolerance of 10% to the nominal heating voltage of 12.6V, everything is in the green zone.
Files
How To Build it
Even though most of the components are mounted on the PCB and the SB60 operates with uncritical voltages, the assembly has to be done very carefully, because there are many connections from the PCB to the external components. The use of suitable tools and a good soldering iron, which can also be used for fine soldering, is a matter of course. Attention should also be paid to the solder used. We recommend the use of commercially available solder, as it is very easy to handle.
You can find the kit of the SB60 at the TT-Shop.
An keep in mind …
- Before installation, check components for correct values using a multimeter
- for components with polarity, e.g., electrolytic capacitors, pay attention to the installation direction
- do not leave cables too long
- use suitable tools, especially soldering irons; soldering guns are usually unsuitable
- pay attention to clean soldering joints
- work carefully and think first, then act
- and if something does not work, do not immediately assume that a component is defective, but try systematically to isolate the fault
Sugar Inside